SUPERCHARGE YOUR ONLINE VISIBILITY! CONTACT US AND LET’S ACHIEVE EXCELLENCE TOGETHER!
Screaming Frog is a powerful website crawler and SEO tool that allows users to analyze and optimize their websites for better performance and search engine rankings. It is widely used by SEO professionals and web developers for its ability to crawl websites quickly and provide in-depth insights into various on-page and off-page SEO factors. The tool can generate comprehensive reports on website elements such as meta tags, headers, links, images, scripts, and much more. Screaming Frog’s user-friendly interface and customizable options make it a valuable asset for website audits, allowing users to identify and address potential issues efficiently.

Importance of Comparing Crawls for Identifying Changes and Issues
- Identifying Changes and Potential Issues:
Regularly comparing crawls is a foundational practice for website maintenance and optimization. It allows users to spot changes and potential problems that can arise when a website undergoes updates, redesigns, or content changes. By comparing crawls across different versions or periods, users can see how changes affect the website’s performance and functionality. This practice is crucial for ensuring the website remains current, functional, and aligned with the latest standards and practices. It also helps to catch and address issues before they become larger problems, ensuring a seamless user experience and consistent website performance.
- Detecting Discrepancies:
Crawl comparisons enable users to identify and address discrepancies within their website, including broken links, missing content, and changes in meta tags or headers. These discrepancies can harm user experience and search engine optimization (SEO) efforts. Broken links lead to frustration and negative impressions from users, while missing content disrupts the user journey and impairs the overall site experience. Changes in meta tags and headers can affect SEO performance and how search engines perceive the site. Detecting these issues through crawl comparisons allows users to take proactive steps to resolve them, thereby maintaining a cohesive and effective website.
- Maintaining Consistency and Optimizing Performance:
This process helps maintain consistency and optimize website performance for both user experience and search engine rankings. Comparing crawls across different versions of a website helps maintain consistency in content and structure, which is vital for both user experience and SEO performance. Consistency ensures that users receive the same high-quality experience regardless of how or when they access the site. It also helps search engines understand the site’s structure and content more clearly, leading to improved rankings. Consistent website performance builds trust and loyalty among users, which can translate into higher engagement and conversion rates. By regularly comparing crawls, users can optimize their websites for better usability, accessibility, and search engine visibility.
- Monitoring Website Health:
Monitoring website health is a key aspect of effective website management. By regularly comparing crawls, users can track the health of their website and observe how changes and updates impact its performance over time. This practice provides insights into various metrics such as page load times, site speed, and response times, all of which affect user experience and SEO. Tracking progress through crawl comparisons helps users understand the outcomes of their efforts, enabling them to adjust strategies as needed. This continuous monitoring helps prevent the accumulation of issues and ensures the website stays optimized and up-to-date.
- Making Data-Driven Decisions:
Analyzing crawl comparisons provides users with valuable data and insights that guide decision-making processes. These comparisons reveal how changes and updates have impacted the website’s performance, user experience, and search engine optimization. Armed with this data, users can prioritize areas for improvement and take action to resolve issues efficiently. Data-driven decisions are more effective and targeted, leading to better outcomes in terms of website performance and user satisfaction. By addressing issues promptly, users can maintain a high-performing website that meets the expectations of both users and search engines.
Purpose of the Guide: To Help Users Understand How to Compare Crawls in Screaming Frog:
The purpose of this guide is to provide users with a clear and comprehensive understanding of how to compare crawls in Screaming Frog effectively. By following the steps outlined in this guide, users will learn how to load, select, and configure crawls for comparison, as well as how to interpret the results and take appropriate action based on the findings. This guide aims to empower users to leverage Screaming Frog’s comparison features to maintain consistency between mobile and desktop versions of their websites, identify issues quickly, and optimize their site for improved user experience and SEO performance.
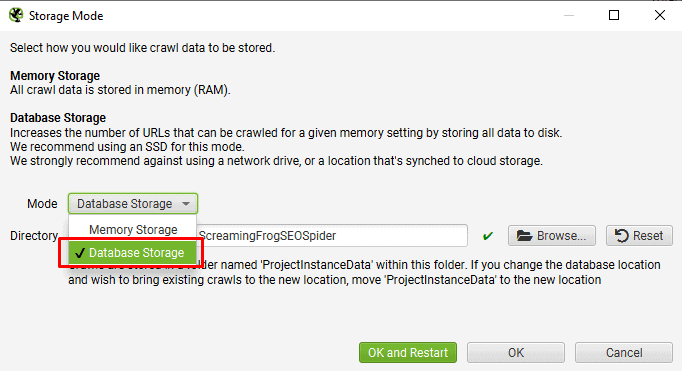
1) Switch To Database Storage Mode
To compare crawls, you need to be in database storage mode and have a licence. You can switch to database storage by selecting ‘Config > System > Storage Mode’ and ‘Database Storage’.
Then Crawl the website
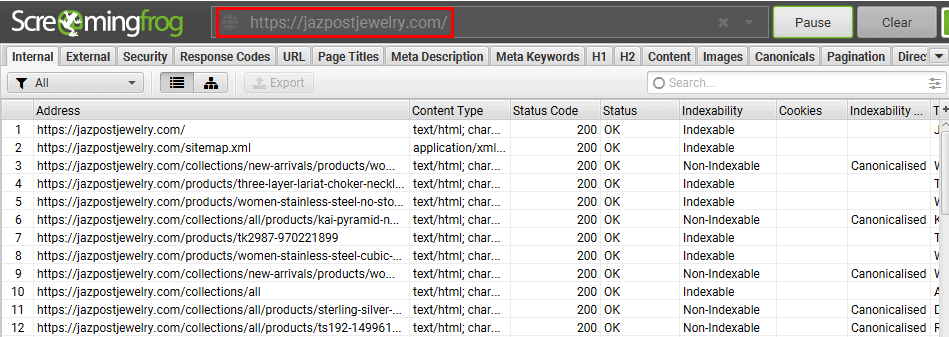
Assure that another old crawl of this website is present
2) Select Crawls To Compare
To compare crawls, at first follow the step Files>crawls

Then select the old crawls and new crawls. And then click on “select to compare”
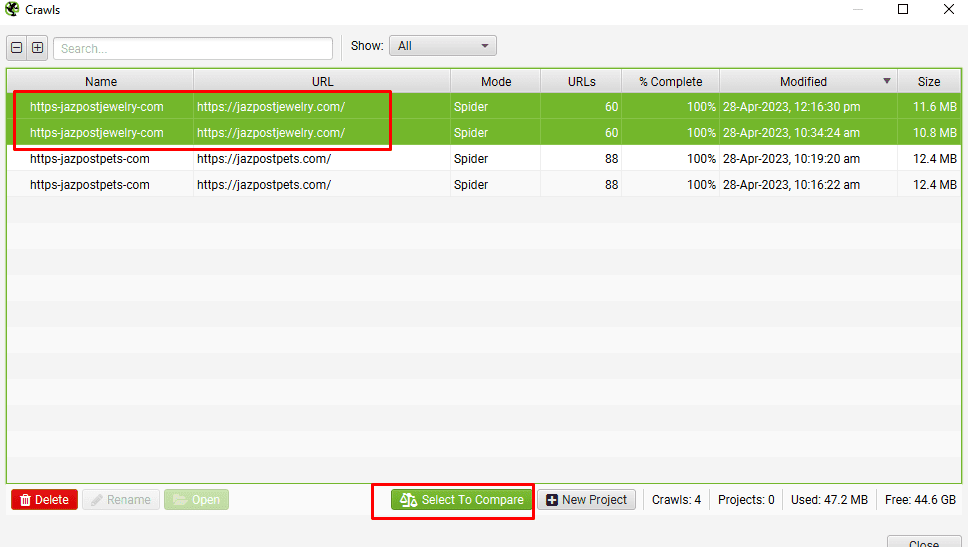
Then this window will open:
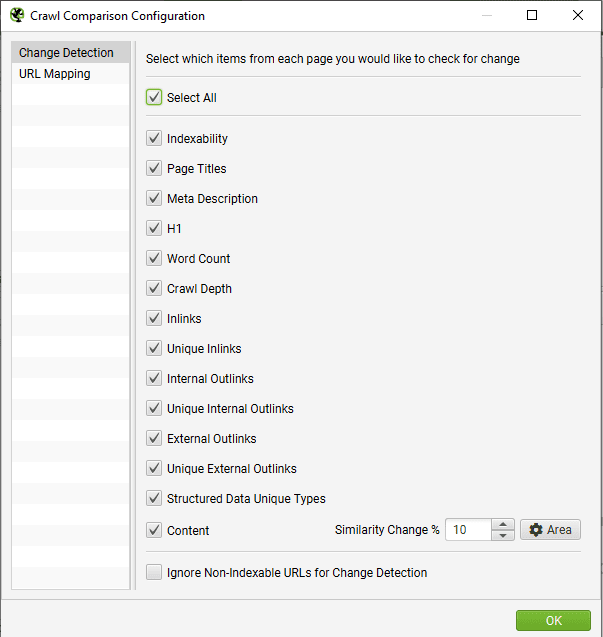
3) Adjust Comparison Config For Change Detection
To adjust Comparison, Follow the step Configure>Compare
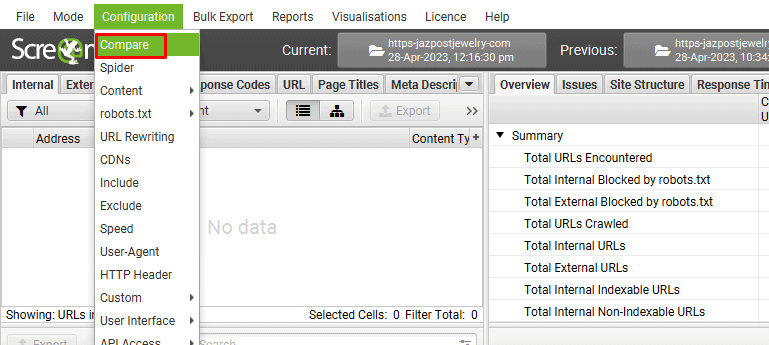
And select the elements and metrics you want to identify changes in.
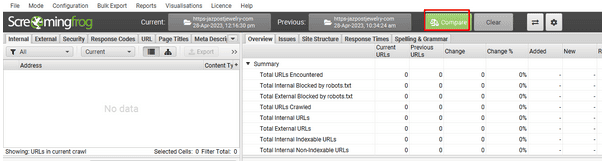
4) Click ‘Compare’ To Perform The Analysis
Next up, just need to click ‘Compare’. The crawl comparison analysis will then run.
5) View The Right-Hand ‘Overview’ & ‘Issues’ Tabs
When the crawl comparison analysis has completed, the right-hand overview and issues tabs will populate to show current and previous crawl data and changes.
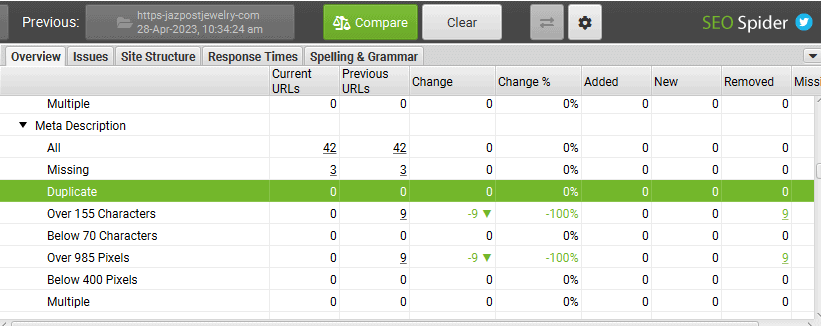
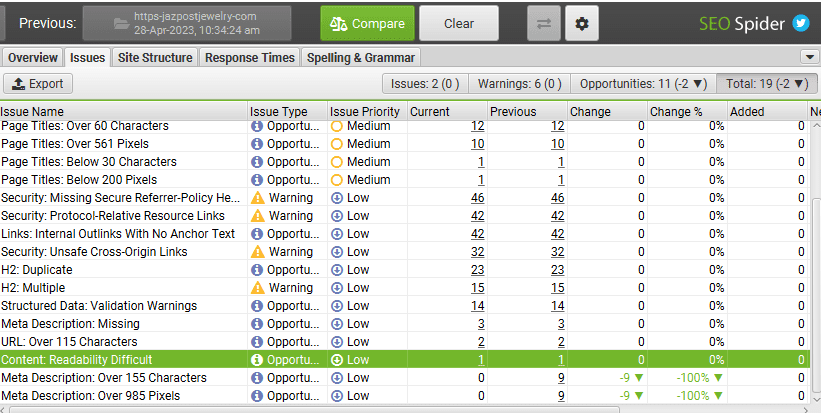
There are 4 types of filters are present “Added”, “New”, “Removed”, “Missing”
Click any filter to know the changes between 2 crawls.
In “Removed’ filter, it is showing that, 9 over 155 meta descriptions have mean removed, meaning this issue is fixed.
7) View ‘Site Structure’ Tab To Visualise Changes
This step is optional. Site structure tab can be checked to analyse the changes in site files.
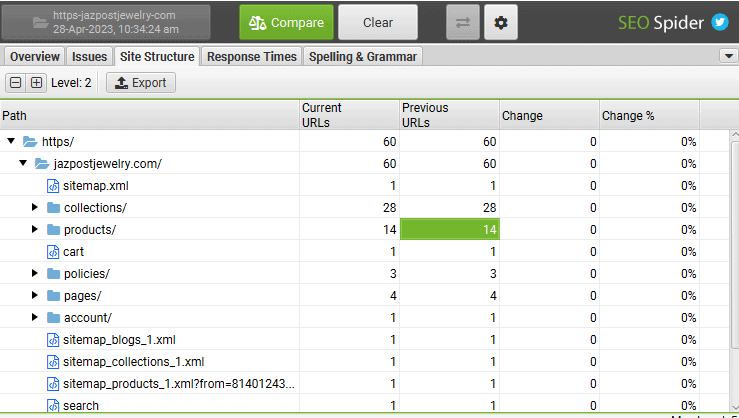
In “Site Structure” tab, there are no changes visible.
The overview data can be exported using the ‘Reports > Crawl Overview’ export.
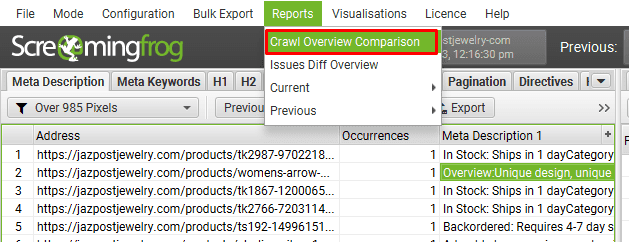
All data can be exported in bulk via ‘Bulk Export’, and reports are also accessible via the ‘Reports’ menu.
Best Practices for Comparing Crawls
Regularly compare crawls to maintain parity between mobile and desktop sites:
It’s crucial to compare crawls regularly to ensure that your mobile and desktop sites maintain parity in terms of content, functionality, and user experience. Consistency between both versions helps deliver a seamless experience for your users, regardless of the device they use. Discrepancies between mobile and desktop can lead to a disjointed user journey, which may result in increased bounce rates and decreased user engagement. By routinely comparing crawls, you can identify any discrepancies early and take corrective action to ensure your site performs optimally across all platforms.
Prioritize discrepancies based on their impact on user experience and SEO performance:
When analyzing crawl comparisons, it’s important to prioritize discrepancies based on how they impact user experience and SEO performance. Issues that significantly affect site speed, navigation, or content accessibility should be addressed immediately to maintain a positive user experience. Similarly, discrepancies that hinder SEO performance, such as inconsistent meta tags or missing content, should also be high on your list of priorities. Addressing these issues promptly helps maintain your site’s reputation and visibility in search engine results, ultimately leading to better overall site performance.
Keep track of changes made as a result of crawl comparisons for future reference:
Documenting changes made based on crawl comparisons is essential for continuous improvement and future reference. By keeping a record of the discrepancies identified and the actions taken to resolve them, you create a valuable resource that can be used to guide future website updates and maintenance. This documentation also helps track the impact of the changes on your site’s performance over time, allowing you to measure the effectiveness of your strategies. Additionally, having a clear record of changes can be useful for ensuring compliance with web standards and regulations, as well as for collaborating with other team members on website optimization projects.
Conclusion
Comparing crawls in Screaming Frog is a critical process that provides valuable insights into the performance and consistency of your website across different devices and time periods. This practice helps you identify discrepancies in content, functionality, and user experience that could impact your site’s overall performance. By using Screaming Frog’s crawl comparison features, you can ensure your website maintains parity between mobile and desktop versions, delivering a seamless user experience. Regularly comparing crawls helps you spot issues early, allowing for timely corrections and optimizations that enhance your website’s effectiveness and reputation.
We encourage you to use the steps outlined in this guide to conduct crawl comparisons in Screaming Frog and ensure consistent, high-quality user experiences across devices. By following this process, you can maintain a website that performs efficiently and meets the expectations of both users and search engines. A seamless, well-optimized website not only leads to higher engagement and satisfaction but also boosts your site’s visibility and rankings. Make crawl comparisons a regular part of your website maintenance routine to stay ahead in the competitive digital landscape and continuously improve your website’s performance.